内容目录
一、Conda虚拟环境创建与Python模块安装
1、搭建虚拟环境
(1)第一步:创建虚拟环境
打开Anaconda Powershell Prompt,输入 conda create --name py39 python=3.9 来创建虚拟环境
- 本质:创建文件夹py39
conda info:查看虚拟环境安装的位置路径
(2)第二步:切换进入虚拟环境
conda env list:罗列出所有已有的环境conda activate py39:激活进入虚拟环境conda list:查看当前环境中,所有安装过的所有python模块和非python的程序pip list:查看当前环境中,所有python模块
2、安装python模块
① 第一种方式:pip install xxx
(1)第一步:配置镜像
进入到家目录,创建pip文件夹,在pip文件夹下创建 pip.ini 文件
- 注意:要把扩展名展开,然后再更改后缀名!
- 用记事本打开,粘贴以下内容并保存
[global]
index-url = https://pypi.tuna.tsinghua.edu.cn/simple
[install]
trusted-host = pypi.tuna.tsinghua.edu.cn
以上是配置清华镜像,配置豆瓣、阿里云等镜像也可以,相关链接更改即可
- 豆瓣:
[global]
index-url = http://pypi.douban.com/simple/
[install]
trusted-host = pypi.douban.com
- 阿里云:
[global]
index-url = https://mirrors.aliyun.com/pypi/simple/
[install]
trusted-host = mirrors.aliyun.com
国内几个好用的Python镜像服务器地址:
- 清华大学镜像站:https://pypi.tuna.tsinghua.edu.cn/simple/
- 阿里云镜像站:https://mirrors.aliyun.com/pypi/simple/
- 中科大镜像站:https://pypi.mirrors.ustc.edu.cn/simple/
- 中国科技大学镜像站:https://pypi.mirrors.ustc.edu.cn/simple/
- 中国科学技术大学镜像站:https://pypi.mirrors.ustc.edu.cn/simple/
- 华中科技大学镜像站:https://pypi.hustunique.com/
注意事项:
- Linux配置pip镜像方式稍有不同,但内容方式一样的
- 在根目录下创建或修改
~/.pip/pip.confpip配置文件
(2)第二步:
安装模块
- 此处以安装numpy模块为例,输入
pip install numpy即可 - 也可以指定版本安装,如:
pip install numpy==1.16.5- 会自动先卸载当前的版本再安装
- 会自动先卸载当前的版本再安装
(3)第三步:卸载模块
pip uninstall numpy,这里无需加版本号
② 第二种方式:conda install xxx
(1)第一步:配置镜像
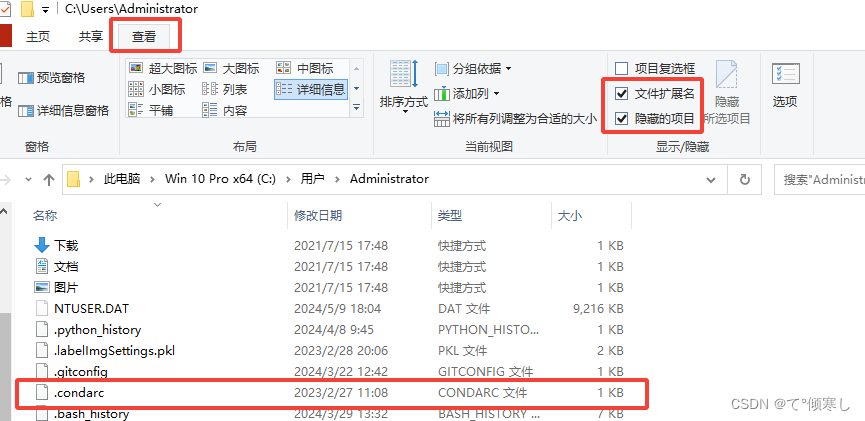
用户家目录下创建文件 .condarc,注意这是一个隐藏文件,需要让文件夹显示 隐藏的项目:
- 用记事本打开,粘贴以下内容并保存:
show_channel_urls: true
default_channels:
  - https://mirrors.tuna.tsinghua.edu.cn/anaconda/pkgs/main
  - https://mirrors.tuna.tsinghua.edu.cn/anaconda/pkgs/r
  - https://mirrors.tuna.tsinghua.edu.cn/anaconda/pkgs/msys2
custom_channels:
  conda-forge: https://mirrors.tuna.tsinghua.edu.cn/anaconda/cloud
  msys2: https://mirrors.tuna.tsinghua.edu.cn/anaconda/cloud
  bioconda: https://mirrors.tuna.tsinghua.edu.cn/anaconda/cloud
  menpo: https://mirrors.tuna.tsinghua.edu.cn/anaconda/cloud
  pytorch: https://mirrors.tuna.tsinghua.edu.cn/anaconda/cloud
  simpleitk: https://mirrors.tuna.tsinghua.edu.cn/anaconda/cloud
channel_priority: flexible
(2)第二步:安装模块
此处以numpy为例,输入 conda install numpy 即可
conda list:显示当前已有的模块conda uninstall numpy:卸载模块conda install numpy==1.16.5:安装指定版本
注意:
-
安装的模块,所需的依赖模块,不仅仅是python模块,建议使用conda安装
-
conda 卸载模块时,会将当前模块、以及以当前模块为依赖的所有模块 统统卸载
-
conda remove -n py39 --all:删除py39的虚拟环境
二、关联虚拟环境运行代码
1、方式一:命令行
打开Anaconda Prompt,conda activate xx切换到相应的虚拟环境
2、方式二、Pycharm
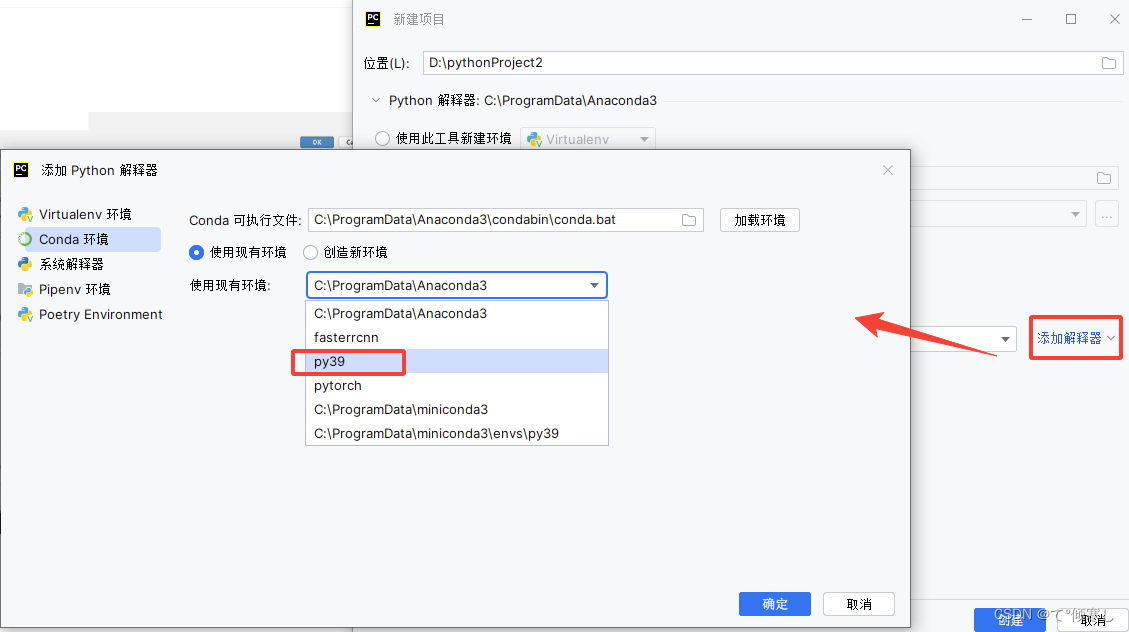
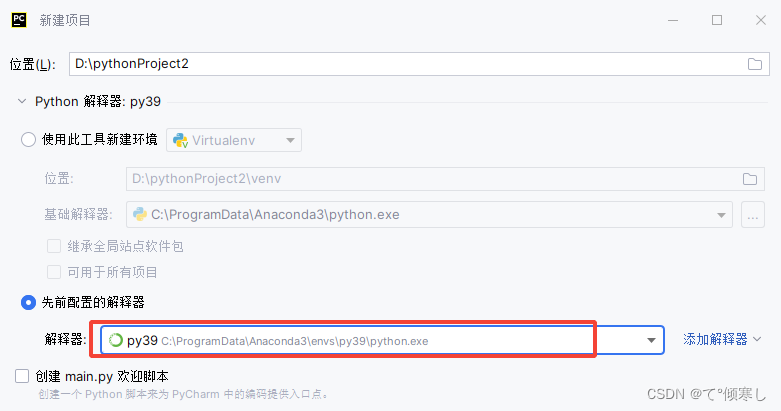
创建项目时,指定虚拟环境
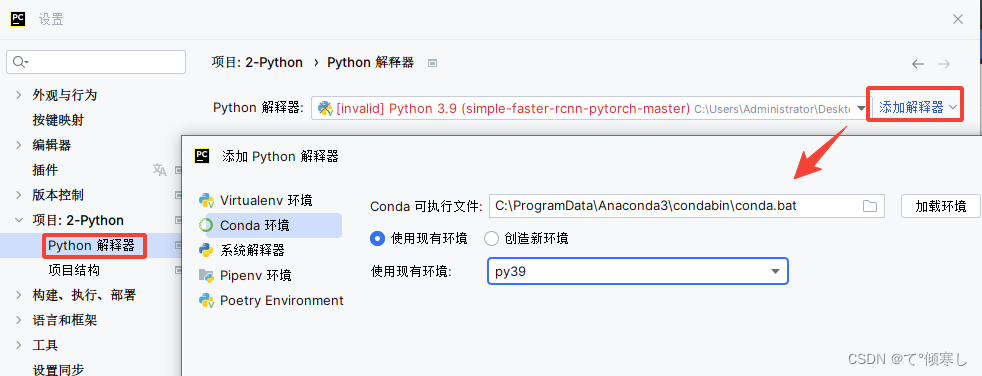
若已有项目,想切换到虚拟环境执行:
运行结果:
3、方式三:Jupyter
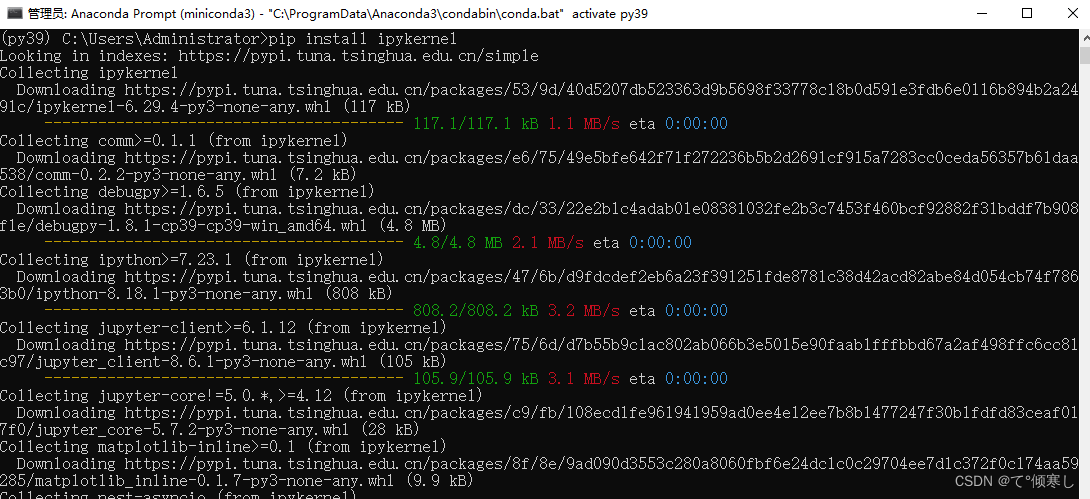
- 在虚拟环境中首先安装
pip install ipykernel
回到base环境中,将环境写入notebook的kernel中:
conda deactivate
jupyter kernelspec list
python -m ipykernel install --user --name py39 --display-name py39  #最后的py39是在jupyter中想要显示的环境名称
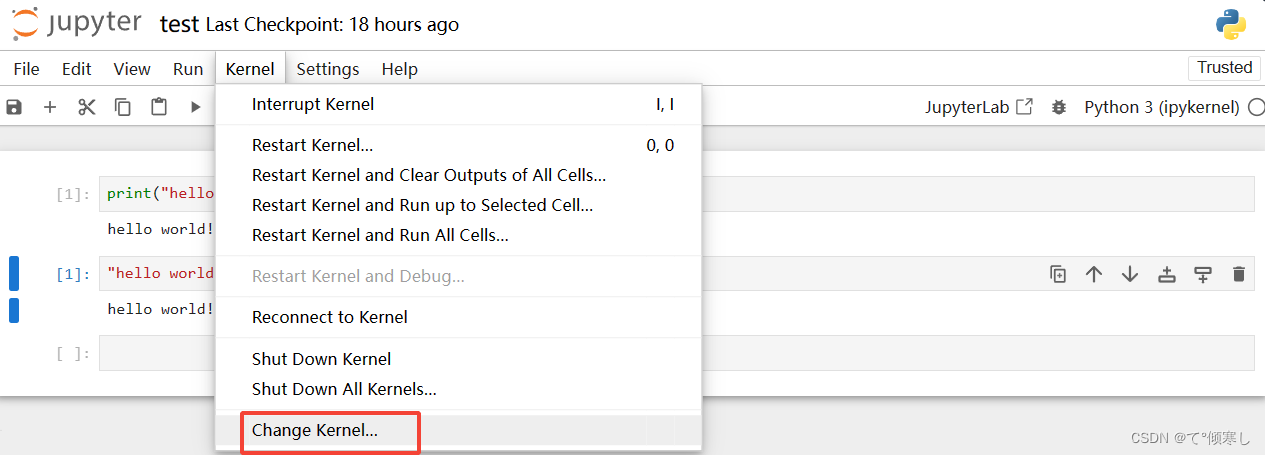
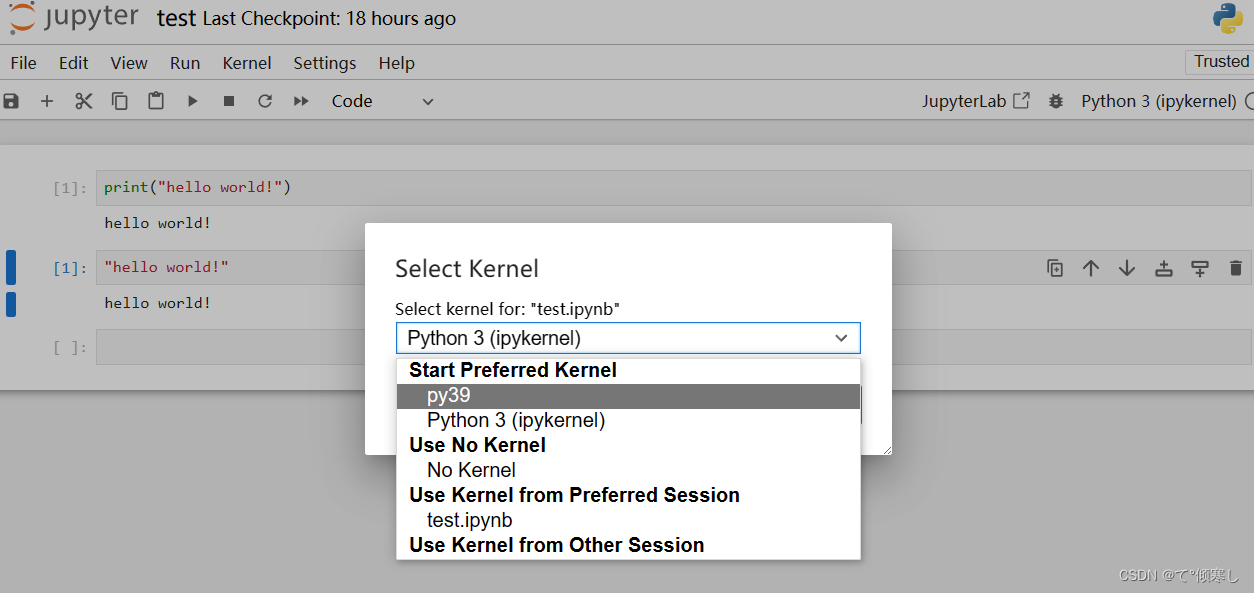
输入 jupyter notebook,启动后可以新建脚本选择使用py39,就是使用虚拟环境
或者在已经打开的脚本中,切换使用虚拟环境运行代码
删除kernel环境:
jupyter kernelspec remove 环境名称
© 版权声明
文章版权归作者所有,未经允许请勿转载。
THE END











暂无评论内容